ZOOM SETTINGS
FOR A MUSIC LESSON
1. LAPTOP AUDIO SETTINGS (scroll down for iPad)
After launching Zoom go to
Settings - Audio,
Find an Audio Profile section,
Select Original sound for musicians, and turn on three boxes below (High Fidelity, Echo Cancellation, Stereo).

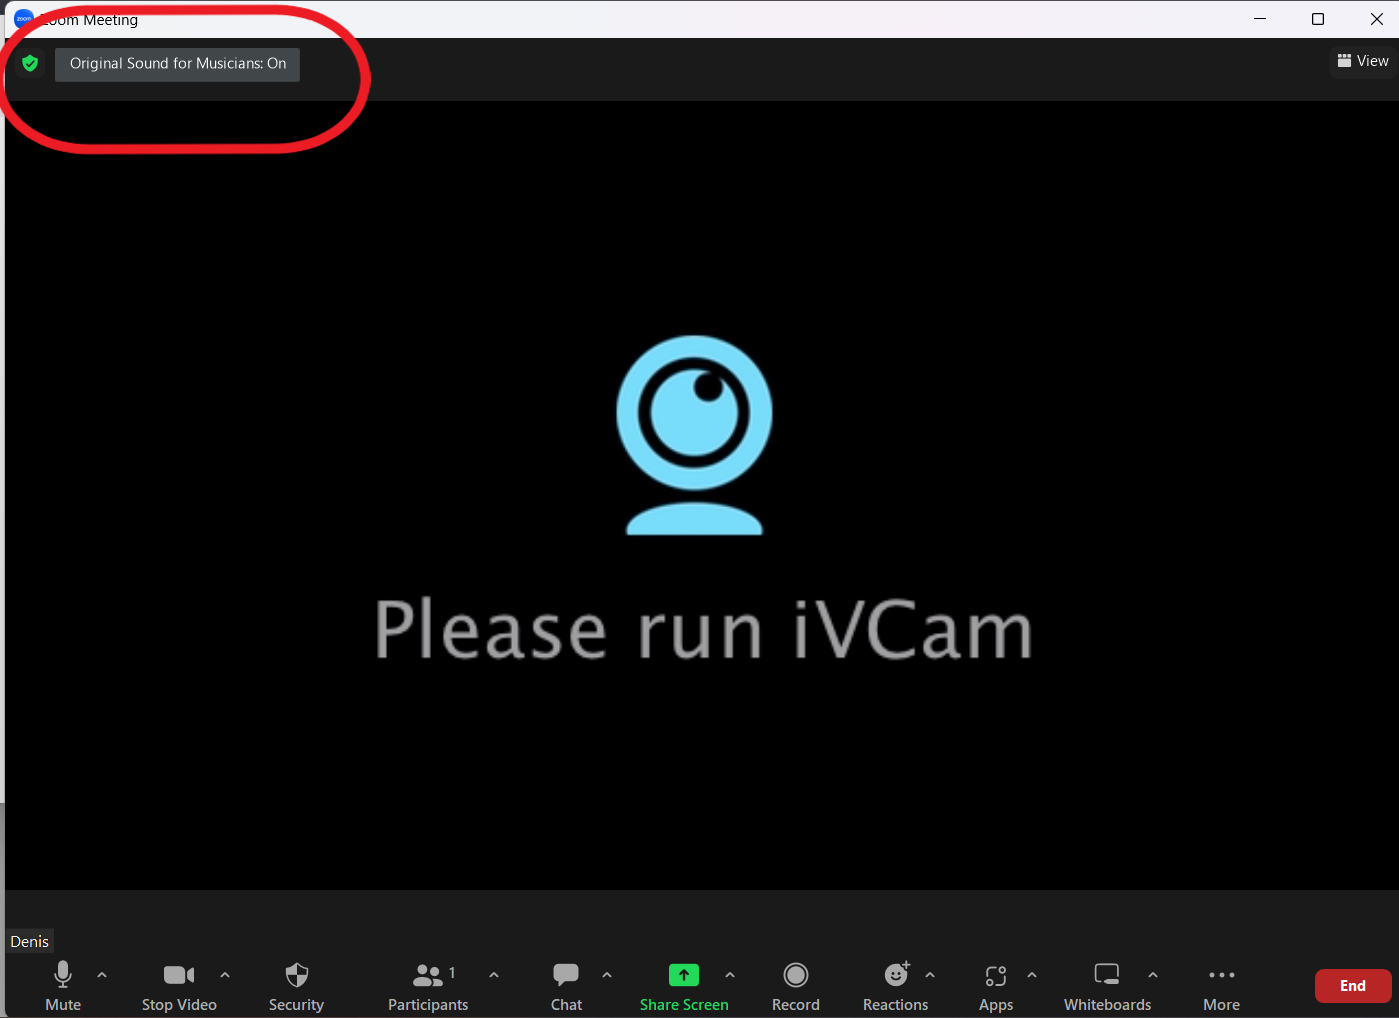
Then start/return to the meeting, look at the upper left corner of the meeting screen, and make sure the Original Sound for Musicians button is On.
It is recommended to check the Original Sound button at the beginning of each lesson.
2. iPAD AUDIO SETTINGS
In Ipad, open your Zoom app and click on “More” from the homepage

Go to Meetings section.
There on top you will find an Audio section, make sure the “Use Original Audio” is enabled for meetings.

Then, join/start the meetings, and after joining click on … More on top of the meeting screen,
and Enable Original Sound also here.

VIDEO CAMERA/DEVICE POSITION
The optimal video camera position is next to the left or right end of the keyboard, on the level of your chest when playing piano, so I could see both of your hands slightly from above the keyboard. Ideally, try to keep a distance so your shoulders and elbows would also fit into the frame.
Example:

MICROPHONE VOLUME (Laptop)
If you are unsure about your microphone levels, you can either select Automatically adjust microphone volume, or set it up manually.
In order to set the volume manually, select the preferred microphone from the dropdown menu, then click Test Mic button in the audio settings. It will record 5 seconds and automatically playback. During this 5-second recording, say a couple of words, and play a couple of loud chords. If you hear a cracking/distortion of the sound, decrease microphone volume by 15-20%, and repeat the test. You will see also a blue splashing bar: this is a microphone sensitivity level (input level). It should reach between 50-80 %, but never approach the very end of the grey field. If it’s below 50% indeed, increase the volume and repeat the test.

using an ADDITIONAL MICROPHONE (laptop) - optional
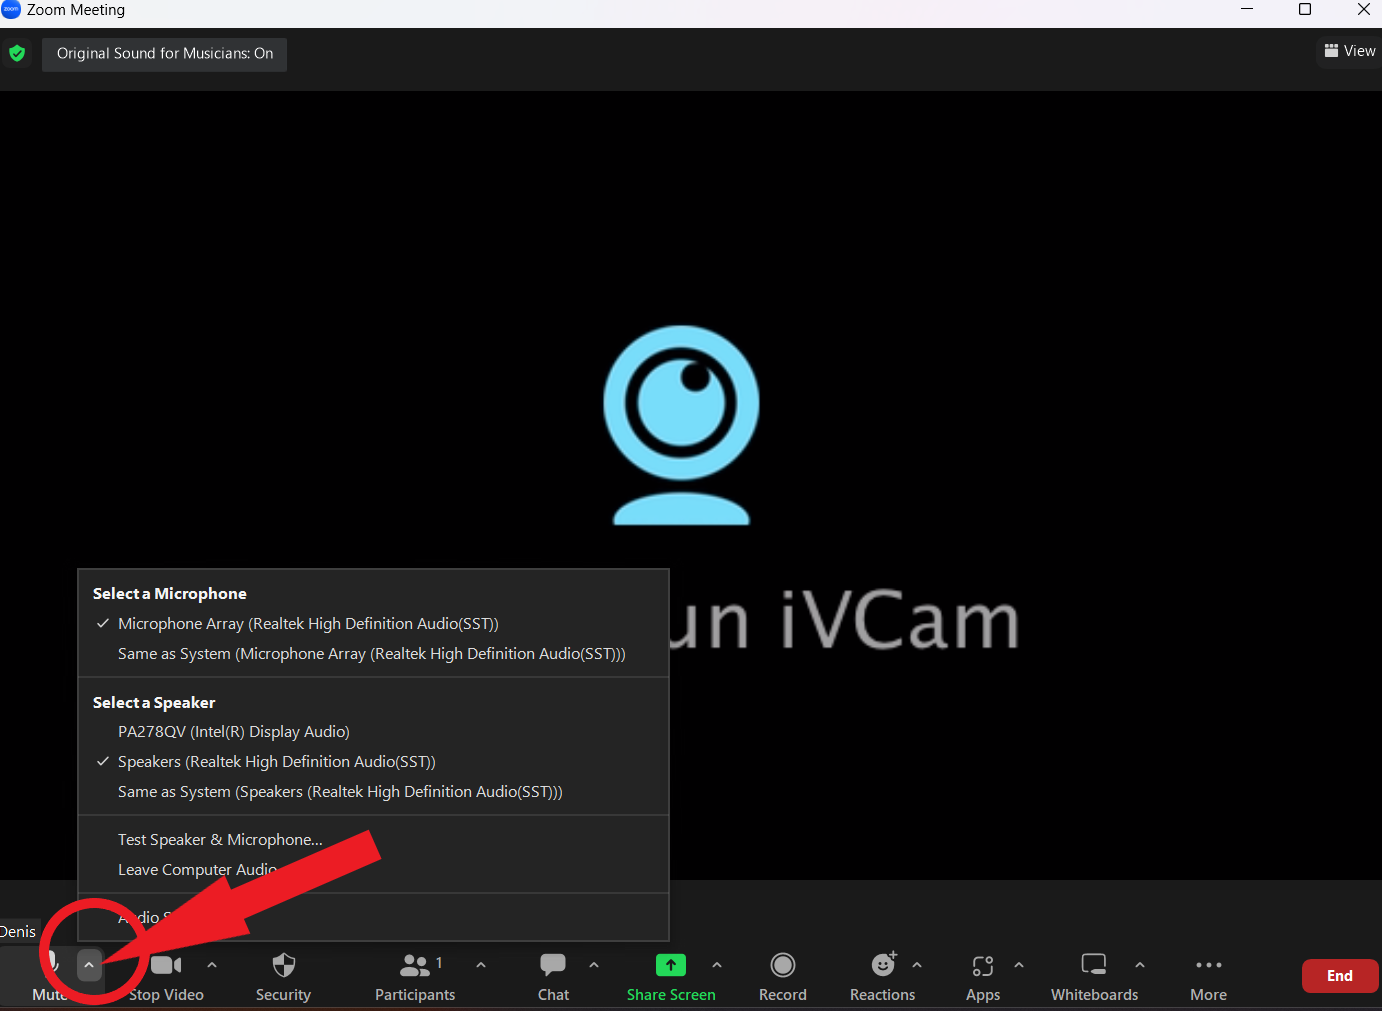
In case you use an additional microphone or speaker, make sure to select them at the beginning of the lesson, by using in-meeting controls. All available audio devices are listed in the drop down menu when you click on the arrow next to the microphone symbol.
Recommendation: If you want to noticeably improve your audio quality on a budget, you can get an easy-to-use USB microphone, like the “Blue Yeti Nano” one, which costs ca. 70-80 USD.
Then look at the upper left corner of the meeting screen, and make sure the Original Sound for Musicians button is On. It is recommended to check Original Sound button at the beginning of each lesson.

using an ADDITIONAL VIDEO CAMERA (laptop) - optional
You can connect an external web camera to your laptop, or you can turn your mobile phone into a web camera. I use my iPhone, which provides a much better video quality then my laptop’s in-built web camera. In order to turn your phone into a web camera, you might need some additional software. I use an app called iVCam, which needs to be installed on both your Laptop and mobile device. Both devices must be connected to the same WiFi network.
In order to choose the right camera when in-Meeting, click on the arrow next to the video sign.
